
This menu is
offered when you right-click the songs list - it lets you perform a variety
of actions like mass-tag, export, copy/move files etc. Show Tags for this File Mass
Change Field - CTRL-R
Search Artist/Title/FileName
Fields (in this list)
Displays a window showing the various tag/meta-data information
available for the current item. This includes: APE, BCX3, CartChunk,
FLAC, ID3v2, JMD, mAirList MMD, Myriad v5/v6 XML, OGG and PlayoutONE. Remember that some file types can not
support all of these data/tag types!
This opens the Mass Change window which offers a number
of bulk-process actions.
Find
tracks within the current list using the Artist, Title or FileName as search fields
- this is useful if you want to find a particular Artist/Title
string.
Copy File/s to...
Copies the selected files to the destination
folder. Will NOT overwrite existing
files.
Move File/s to...
Moves the selected files to the destination
folder. Will NOT overwrite existing files. When the Database is
enabled, the path will be updated with the new
location.
Move File/s Based on 1st
Character
Using the 1st character of the filename, eg: "CLASH -
LONDON CALLING.mp3" would be moved into the C sub-folder of the
root folder you selected. Numbered Artist/Groups, like 10CC or 808
STATE, are moved to a folder called 0. Will NOT
overwrite existing files. When the Database is enabled, the path will be
updated with the new location.
Delete File/s to Recycle
Bin...
Deletes the selected files to the Windows
Recycle Bin, with a "Yes/No" confirmation
(that can be turned-off in the Configu) for each file (safest
method). When the Database is enabled, the Database will be left
intact, requiring use of the Import Wizard to highlight missing
files.
This process invokes a Windows API call, so may be a little slower than the "Permanent" delete offered below, but gives you a safety net of allowing you to restore them if needed.
Delete File/s
PERMANENTLY
As
above, but bypasses the Yes/No for each file AND the Windows Recycle Bin -
you won't get the files back!
There are 3 abort/warning messages beforehand,
but no recovery of files possible once you use it. When the
Database is enabled, the record will also be
deleted.
Copy Selected FileName/s to Clipboard -
CTRL-C
This makes it easier to paste filenames into an M3U playlist, the
Paste Window or Category in StationPlaylist Creator
Remove APE, CartChunk, FLAC, ID3 and OGG Tags from File
Clears the file of any
tag data based on file-type, eg: CartChunk from WAV, ID3 from MP3 etc.
Remove item/s from List (does not Delete)
- DEL key
Removes the selected item/s from the main list but
does not delete any files. This can also be performed using the Delete key which
includes a Yes/No confirmation dialog.
Export Fields / Full Database
On the 2nd tab is a Myriad v5 SQL String creator which produces a custom SQL UPDATE for the selected field+value - this is useful if you have been entering data into MyLibrary and wish to "slipstream" it into Myriad. This is especially handy if you keep a master record of data inside MyLibrary and have been busy adding "Hooks" to your songs and wish to replicate this within Myriad. Items without a Cart/MediaId are skipped.
Science Bit: The resulting SQL String is used with SQL Management Studio and requires some "under-the-hood" experience with SQL - There is NO PROTECTION here for Integer-vs-String types so be very careful about what type of data you are trying to update into Myriad. ie: The Year field isn't a long-form textbox!
The following shows 2 examples of the SQL Update strings that are output:
UPDATE dbo.MediaCopyright SET [Custom1] = '10S/POP1/URBAN' WHERE MediaId =
29680;
UPDATE dbo.MediaCopyright SET [Custom1] = '00S/AFTER/CHILLOUT/INDIE3' WHERE
MediaId = 14202;
UPDATE dbo.MediaCopyright SET [Custom1] = '90S/CHILLOUT' WHERE MediaId =
17718;
UPDATE dbo.MediaCopyright SET [Custom2] = 'O:Normal/E:End//Y:2018/G:Duet/T:Medium'
WHERE MediaId = 29680;
UPDATE dbo.MediaCopyright SET [Custom2] = 'O:Opener/E:Fade//Y:2001/G:Female/T:Normal' WHERE MediaId = 14202;
UPDATE
dbo.MediaCopyright SET [Custom2] = 'O
:Talkup/E:Fade//Y:1993/G:Male/T:Slow' WHERE MediaId =
17718;
Putting this information into the Mediawall Carts means that, if you copy them to another Station Database inside your Myriad system, you'll still have the extra library data to work with - and as a backup in case any mass-change/move routines go wrong inside AutoTrack/Myriad-Schedule!
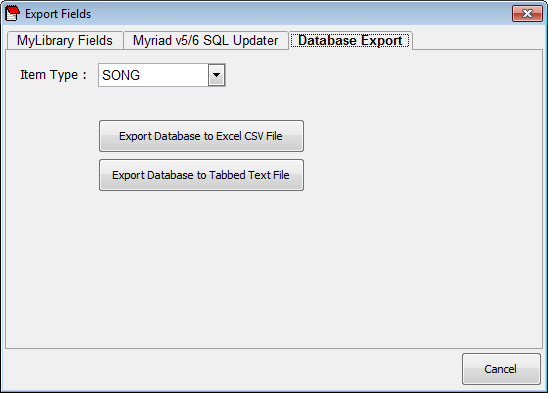
The 3rd tab allows for a full Database export of each ItemType - saving to CSV or Tab text file.
Export to ADE/ID3/SPL Tags
- CTRL-TExport to
Cart Chunks - CTRL-G
Saves your track data to the broadcast-standard
Cart Chunk format. There are 3 Cart Chunk profiles available: EncoDAD,
Myriad and RCS. This is because they each use the PostTimer (cue marker)
fields in different ways. Please ensure you select the right profile for
the automation system you plan to use.
Export to FLAC Tags -
FLAC files
only! - CTRL-F
Saves
the current data to FLAC tags
Export to ID3/Audio Tags - CTRL-I
This
is a domestic tagging routine and saves to ID3v1, ID3v2 and AUDIO
tags in MP3 files plus AUDIO tag in WAV files
Export to JMD Files -
these are preferred
method of maintaining your song data - CTRL-J
Saves the current data in the list view to JockMaster JMD
files .
Export to M3U
Playlist - CTRL-E
Creates a standard Winamp-style (single line, path\filename) playlist from the
selected files
Export to Excel CSV File
Creates a true comma-delimited file with "
qualifier, eg: "field1","field2","field3" etc
Export to Tabbed File
- CTRL-Y
-
improved feature!
Exports to a text file
featuring all list columns/fields. The first line contains the column/header
names and will open in Excel/OpenOffice for editing. The format can be tab-delimited
or use a special character, defined in the Configuration .
You can re-load (or merge selected fields) back into MyLibrary, this process is detailed on the MyLibrary Screen page. You can re-order the layout of the columns, delete them etc so long as the top (headers) have the matching column/field names for re-load back into MyLibrary.
Column/Field Names :
Artist, Title, CueIn, Intro, Intro2, Intro3, Segue,
Duration, ReleaseYear, ItemType, Style, Opener, EndType, Gender, Tempo,
LastPlayed, MediaRef, Track, FileName, Comment, ID, ISRC, HookIn, HookOut,
Modified, OriginalPath, Artists, RelatedArtists, Sweeper, WasMP3, BPM,
StartDate, KillDate, Customer, DuckIn, DuckOut, Rating, Album, FadeAll,
BackupPath, Mood, Custom, Station, Show, Publisher, Composer, RecordLabel,
ClientID, AccountManager
Top Tip! - Let's say you have a ripped CD but the filenames are Track01.wav , Track02.wav etc and you have the tracklist copied from an online catalogue. Simply load the files into MyLibrary, export to a Tabbed Text File, open it in Excel/OpenOffice - remove all but the Artist/Title and FileName fields. Then paste the Artist/Titles you have into the spreadsheet. Save it, then re-open it in MyLibrary. You'll now have a list with populated Artist+Titles plus the original filename. This will then allow you to use Mass Change Fields to rename those files based on Artist - Title.wav format. Once you've done that, re-load the files and if you're using JMD as a data source, the files will auto-populate with any matching data files.
Copy
%token% CSV Format to Clipboard
Puts the defined %token% CSV
template onto the Windows clipboard - can be used with mAirList or RCS Zetta
when you need to import (or update) information in the
database.
Check
ID3 Tags
Performs a check against the current list's Artist field
and the MP3's ID3v2 Artist field.
Special Actions
Additional
functions are explained here...
Check Durations (alternative
version finder)
This will re-scan the selected item/s' Segue point and, if
the new value is <>10seconds from the value stored in the "Segue" column,
it will add it to the FilterList for attention. This is useful when you
load a new set of tracks which match with JMD Filenames (so appear to be
unwanted duplicates) - However, what if they are a different edit/mix?
This routine helps to avoid deleting what you think is a duplicate - but is, in
fact, a generically-titled "12 INCH EDIT".
Check ID3v2 Tags
Using the
selected file/s, this reads ID3v2 Tags and checks whether they match the current
"Artist" and "Title" fields. If either the "Artist" or "Title" fields do
not match the ID3v2 tags, that entry will be added to the (blue) filter list for
attention/tagging.
Create Artist List
This creates/overwrites a table in the Database
dedicated to each individual Artist in your collection. If
the Database is not enabled, the list will
be created from the selected items in your MyLibrary listview - so you'll need ALL
your songs loaded if using folders/files! With the
Database enabled, this list is create from within the Database, even on an empty
list. It is also added to on-the-fly as you save a SongCard or perform
a Mass Change
operation.
It then allows you to populate the "Related Artists" box on the SongCard to select any matching "Related" Artists/Grups for that particular song.
Create Album/Gender/Year
Lists
This creates/updates a file in your application
folder Genders.ini which contains a reference to the Artist field and their
Gender. This is useful when you have songs that may be missing that value,
so rather than edit each one manually, you can load a list of tracks and perform
a scan using the Mass Changer
.
If you are using the Database , this routine will export all distinct Artists regardless of any list view. If you are not using the database, you will need to load all your songs into MyLibrary, select all (CTRL-A), then use the menu Library Actions>Special Actions>Create Gender List - this will create a master list from the selected items. An empty field or "Unknown" will be ignored. You can then load/select any songs without a Gender value and use the Mass Changer to assign them to any matching Artists.
From v3.72, a sample file is provided offering ~750 80s Artists/Groups so load any song from that era and try it out - The Artist field must match exactly, but should work 9 times out of 10 unless the name is rather odd or contains punctuation/symbols. YMMV.
The Genders.ini file can be updated with small groups of Artists as needed - the routine is an Add/Update export, it does NOT clear the file.
The file is also updated (and read) within the SongCard, so if you open a new track by an Artist/Group already somewhere in your library, the Gender field will auto-populate.
Find and Swap
Artist/Titles
This routine can find+fix the naming of items where the Title
includes a "featuring" (or similar) piece of text and you wish to have it moved
to the "Artist" field, eg: ARTIST123 - MY SONG feat. ARTIST99.wav becomes
ARTIST123 feat. ARTIST99 - MY SONG.wav
Advanced Filter
This
brings up a box offering to
filter tracks by their MP3 bit-rate (128k and 192k) plus VBR (Variable Bit-Rate), and
Channels (ie: mono).
Sync WAV Files
This routine
works with your MP3 tracks loaded into the main view, having set a WAV Folder in
the Configuration - the process will look for matching filenames (ignoring paths
and file extensions) to collate any differences between your MP3 and CD/Linear
WAV files.
Once the routing is complete, 4 files are created in the main MyLibrary application folder, 2 tabbed text files of matching+missing data, plus 2 M3U playlist files of found+missing files. A summary message is also offered telling you how many files were matched (and missing) so you can quickly see how well your library is doing for "CD" quality versions.
Playout / Scheduler Interfacing
These settings are
mostly for the Pro users and include export formats for AutoTrack/Myriad, Dalet
, Enco DAD/Presenter, Genesys, mAirList, PlayoutONE, PowerGold and RCS
Selector/Zetta .
Dalet XML
In conjuntion with the ACE Audio Conversion
Engine by Trinity Software, you can import audio tracks into the Dalet playout
system with this feature. MyLibrary will output an XML file for each audio
track with a variety of fields - this will allow you to use the Database Search
in Dalet to find tracks by Year, Category etc.
EncoDAD DropBox
Creates a meta-text file for each
audio file - allows you to easily import cuts into Enco's DAD and
Presenter. If Cart Numbers are defined, they will be carried-over to the
EncoDAD Cuts Library.
Enco NewDB XML
Creates and XML file for NewDB, Enco's
replacement for their "DropBox" application.
Send to Genesys
This routine will copy your WAV files
to your Genesys import folder as well as saving the Genesys CartChunk format and
renaming the files to the CartID stored in MyLibrary. This allows you to easily
manage a scheduler with CartIDs as well as a simple "send to playout" method for
getting audio into your system. You can specify what Categories are used during
the import by adding the following new INI settings to MyLibrary.INI - If you do
not set an ImportPath, MyLibrary will prompt you each time you use "Send to
Genesys" for the import location. Setting it here makes everything quicker
especially if you only have 1 Genesys server.
New INI settings for Genesys users:
[Genesys]
ImportPath=\\machine\share\Import\Audio
AdvertPrefix=C
JinglePrefix=J
MusicPrefix=M
VoiceTrackPrefix=V
The prefixes allow
normal Cart Numbers to be renamed so that they import into the right Genesys
Category. ItemTypes ADVERT, JINGLE, SONG and VOICETRACK are supported at
present. PROMO defaults to ADVERT, PACAKGE defaults to JINGLE. The prefixes
above are merged with the Cart Number from MyLibrary in the following way:
ABBA - DANCING QUEEN.wav has a Cart Number of 12345 and
and ItemType of SONG
It is renamed to M12345.wav via the "Send to Genesys"
routine
Genesys interprets M12345.wav as a "song" and imports it into the
MUSIC Category.
JINGLE - TOP OF HOUR.wav has a Cart Number of 54321 and
an ItemType of JINGLE
It is renamed J54321.wav and imported into Genesys as a
Jingle.
The Prefix settings allow you to match MyLibrary to your Genesys Category settings - Some sites use MUxxxxx for Music
Export PowerGold ¬ Import File
This will create a ¬
delimited text file of the selected items and includes special formatting for
PowerGold importing. The Year field is included twice, this allows a Year
Property to be defined during import (saving you doing a Mass Change later on).
Broadcast Radio / PSquared Export
Myriad v5 TSV
"import list" as well as accompanying XML files for each piece of audio can be
created - this is an essential requirement for getting a blank Myriad Playout
system "ready to go" from existing data in MyLibrary - see the
AutoTrack/Myriad CSV page for details.
About Cart Numbers / CutIDs
You do not have to have
any Cart Numbers for Myriad to import from a MyLibrary CSV Export - However, it
is advisable as once you've assigned a Cart Number and sent the file to Myriad,
if a matching filename appears later on (such as from a compilation album) it
will have a Cart Number as well as all the other attributes. This would
alert you to a potential duplicate in the playout system (or your music
library).
Create List for ALL Categories
This routine takes all
of the tracks in your main library and creates a new list with duplicate entries
for multiple Genres/Styles. eg: If a track has a Style of DANCE/POP then
it will appear twice in the list. This is useful for exporting to
schedulers that only permit 1 Category per
item.